Creating a bird feeder from everyday materials not only provides a delightful haven for your feathered friends but also recycles household items that might otherwise end up in waste. This DIY project is straightforward, budget-friendly, and a great way to engage in wildlife conservation from your own backyard. Here’s a step-by-step guide to making your own bird feeder using materials easily found at home.
Also Read: Summer Bird Watching: The Ultimate Guide to Window Feeders
Materials Needed
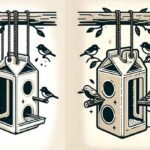
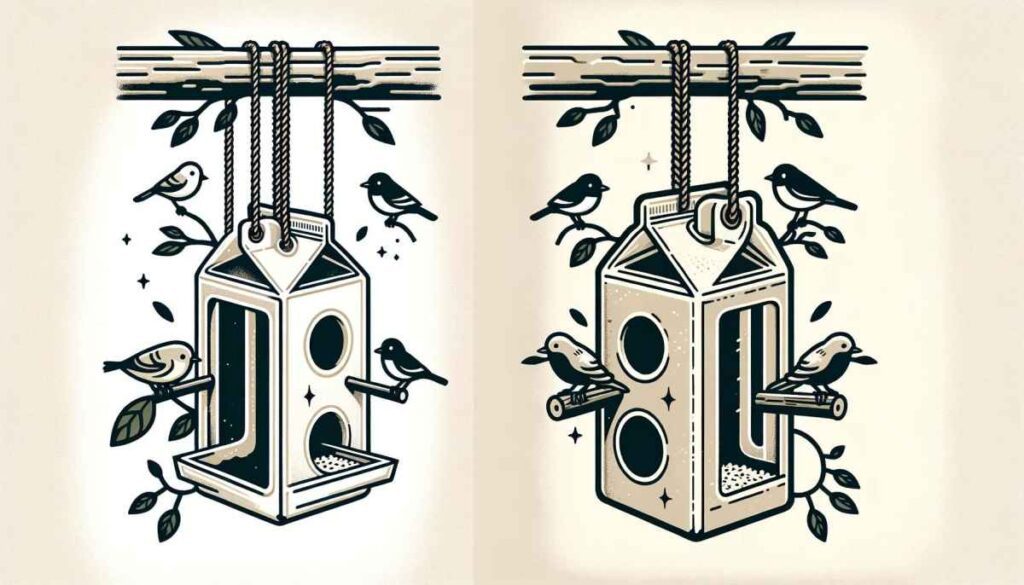
1. Plastic Bottle or Milk Carton – Choose a clean, empty plastic soda bottle (1 or 2 liters) or a milk carton. Ensure it’s thoroughly washed and dried.
2. Wooden Spoons – A couple of wooden spoons will serve as perches for the birds and as a dispenser for the birdseed. These can be old ones from your kitchen, or you can purchase a set, like the OXO Good Grips Wooden Spoon Set. You can use these wooden spoons as perches and attract birds or skip using them at all.
3. String or Twine – This will be used to hang the bird feeder. A sturdy option like the Kinglake Natural Jute Twine is perfect for the job.
4. Scissors or a Craft Knife – To cut holes in the plastic bottle or milk carton.
5. Bird Seed – Select a mix that attracts a variety of birds. The Wagner’s Classic Wild Bird Food is a great choice.
6. Screwdriver or a Nail – To create small drainage holes at the bottom of the feeder.
DIY Instructions: Create your Simple Bird Feeder at Home
1. Prepare the Bottle or Carton: Start by making sure your plastic bottle or milk carton is clean and dry. Remove any labels to allow for clear viewing of birds.
2. Cut Feeding Ports: Use the scissors or craft knife to cut small slits about a third of the way up from the bottom of the bottle or carton. These slits should be big enough to snugly fit the handle of a wooden spoon. Make two opposite slits for one spoon and another set of slits for a second spoon lower down.
3. Insert Wooden Spoons: Slide a spoon through one set of slits until the bowl of the spoon is inside the container. This will allow the bird seed to spill out onto the spoon, giving birds a place to perch and eat. Repeat with the second spoon, ensuring it’s positioned at a different height to accommodate more birds.
4. Add Drainage Holes: Use the screwdriver or nail to poke a few small holes in the bottom of the container. This ensures any water that gets in can drain out, keeping the birdseed dry.
5. Fill with Birdseed: Pour your chosen birdseed into the container through the opening at the top until it’s just reaching the level of the lowest spoon.
6. Hang Your Feeder: Tie the string or twine around the neck of the bottle or the top of the milk carton. Find a suitable spot in your garden where birds feel safe, preferably near a tree or bush, and hang your DIY bird feeder.
7. Maintenance: Regularly check the bird feeder, replenish the bird seed as needed, and clean it occasionally to prevent mold and bacteria buildup.
Wrapping up: DIY – Creating a Simple Bird Feeder at Home
This simple DIY bird feeder project is an excellent way to upcycle household items into something beneficial for wildlife. Watching the birds visit your feeder can provide endless entertainment and satisfaction, knowing you’re supporting local biodiversity. Plus, it’s a fantastic educational activity for children, teaching them about nature and the importance of caring for our environment.
Happy birdwatching!